Corner Kitchen Ideas That Optimize Your Kitchen Space Page
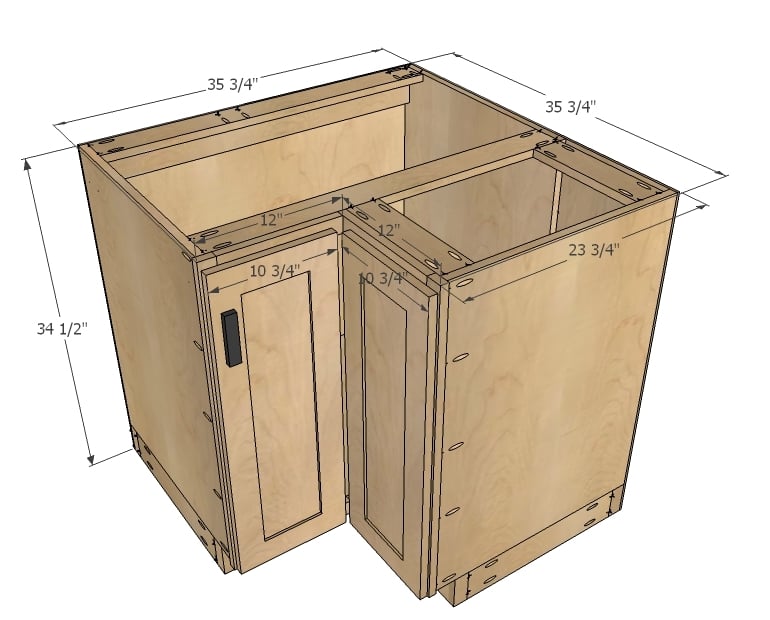
STEP 1- Cut out the pieces. Cut out your plywood pieces according to the cut list. All the cabinet box pieces are cut from 3/4″ plywood except the back corner piece. Cut the back edges of the back pieces at a 45 degree angle so the back corner piece sits flat.
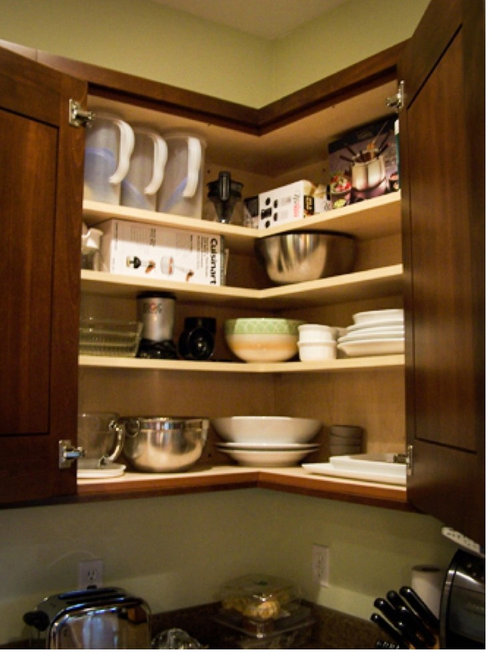
Upper Corner Kitchen Sizes Kitchen Ideas
Drill pocket holes in each end of the shorter piece, and one end only of the longer piece. Assemble the pieces in an "L" shape using glue and 1-1/4″ pocket hole screws. Position the pieces at the upper part of the sides as shown. Secure in place using glue and 1-1/4″ pocket hole screws.

How To Build A Corner China Image to u
Project build article:https://ibuildit.ca/projects/building-a-corner-cabinet-for-the-kitchen/Making the face frame video:https://youtu.be/pOYXgLWfZKQHere are.
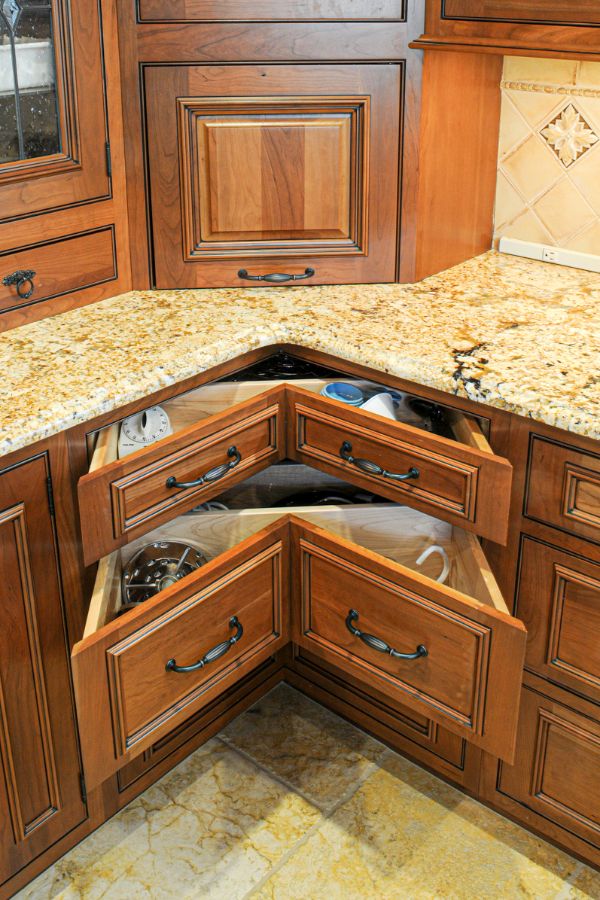
2 Main Benefits of DIY Corner Drawer Ideas The OwnerBuilder
2. Measure the dimensions of the cabinet top, bottom and side pieces on a piece of paper. Cut out the pieces, then trace them onto your sheets of wood. 3. Cut out the top and bottom pieces, the side pieces and the shelves using a table saw or circular saw. 4.

Ana White Wall Kitchen Corner DIY Projects
Kitchen Design Workshop - https://mtkd.ck.page/products/kitchen-design-workshopThis video looks at 6 ways to design a base corner. I'm using the IKEA kitche.
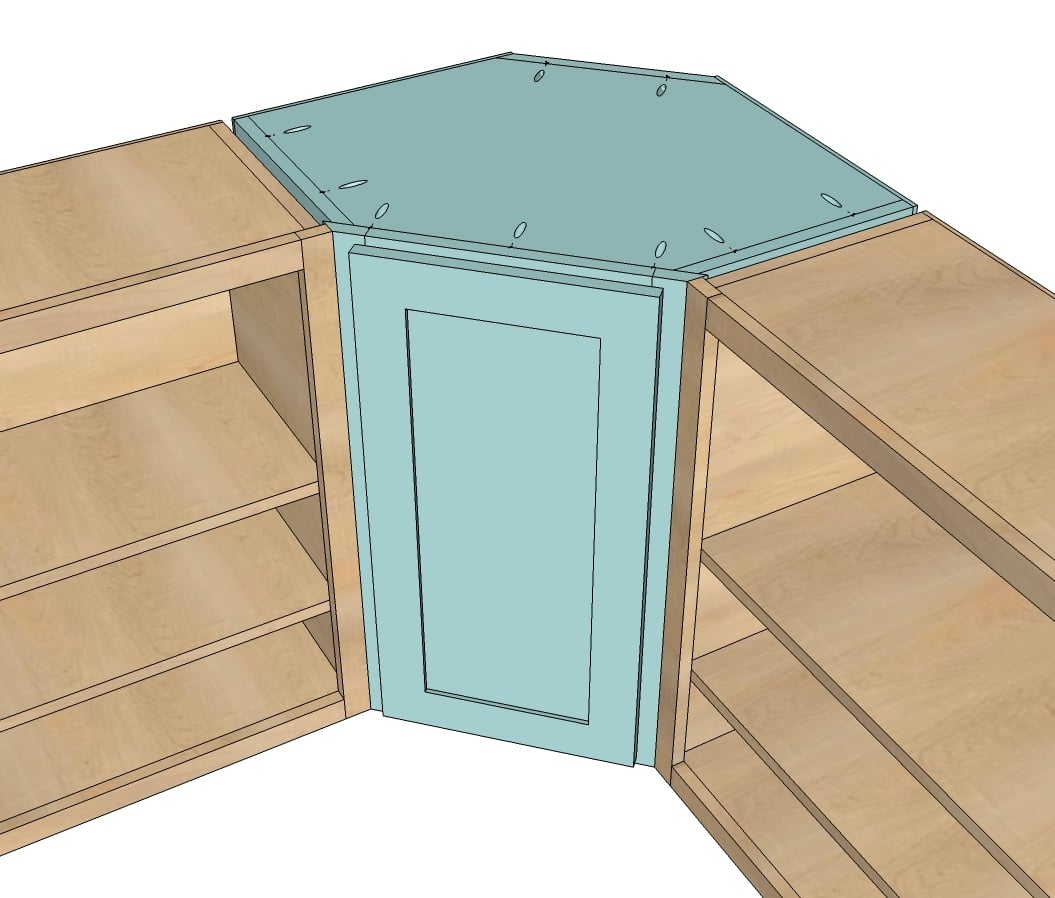
Wall Kitchen Corner Ana White
The 10 DIY Corner Cabinet Plans. 1. DIY Corner Cabinet for Kitchen. Image Credit: Ana White. Check Instructions Here. If you're looking for a corner cabinet for your kitchen, this option is probably the most suitable. It is designed to be fitted against your other kitchen cabinets, only it goes into the corner.
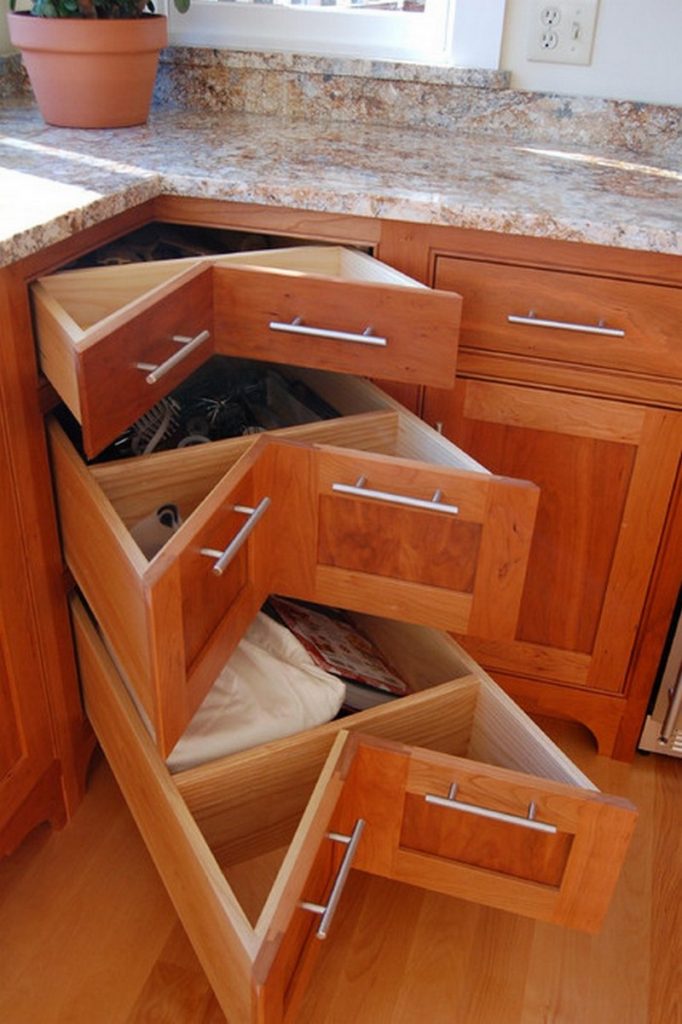
2 Main Benefits of DIY Corner Drawer Ideas The OwnerBuilder
Align the edges and insert 1 1/4″ screws to lock the components together. Add glue to the joint and remove the excess with a damp cloth. Attaching the sides to the cabinet. Build the sides out of 3/4″ plywood and adjust their size using a circular saw. Drill pocket holes along the common edge of the components and insert 1 1/4″ screws.

38 Handy Corner Storage Ideas that will Help You Maximize Your Space
Step One. Cut the pieces for the back of the corner kitchen cabinet. Note that one piece is cut 3/4″ shorter than the other so that both sides are equal from the corner to the end. With the pocket hole jig set for 3/4″ material, drill pocket holes in one end of the longer back piece and both ends of the shorter back piece as shown.
How To Build A Corner Kitchen Sink
The cabinet has a diagonal front and is 2″ deeper than standard upper cabinets, making this corner kitchen cabinet have a sort of reveal on each side. Basically, this cabinet rests on the countertop and extends to the ceiling. If it is not desirable to have the cabinet resting on the countertop, the height of the cabinet is easily adjustable.

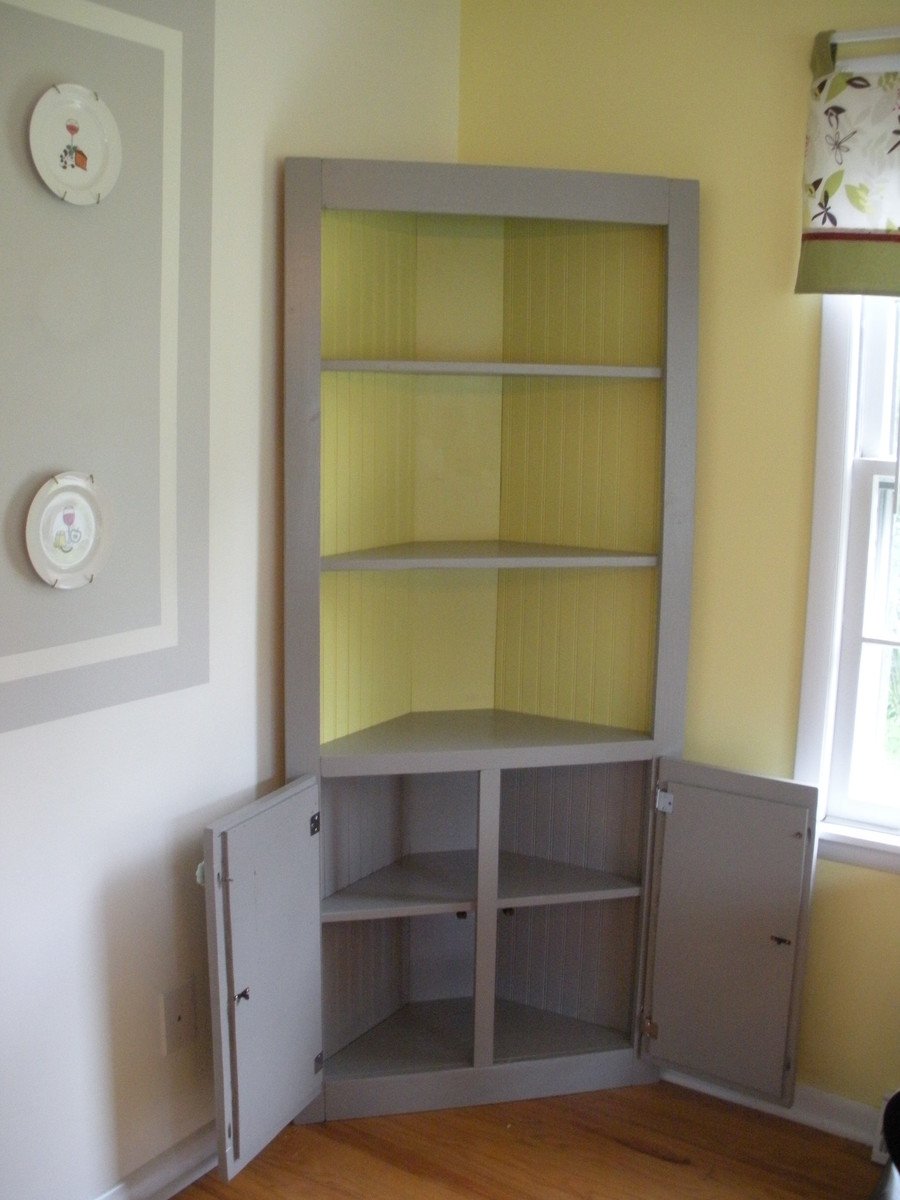
cornersideboard22.jpg (2304×3072) Wood corner Rustic
Step 3. Now it's time to add the bottom for the adjoining side. You will need to use 1 1/4" pocket hole screws and 3/4" pocket holes to attach. Make sure you predrill pocket holes for attaching face frame and side. This seam will be fully supported by the base in later steps.

The 5 Best Organizers to Finally Help You Get Your Corner
Step 2: Cut the Plywood. Based on the measurements taken, cut the plywood to create the cabinet's back, sides, bottom, and shelves. Let's take the example of a corner cabinet with a height of 6 feet and a width of 3 feet. You will need to cut two pieces for the sides, each measuring 6 feet in height and 1.5 feet in width.
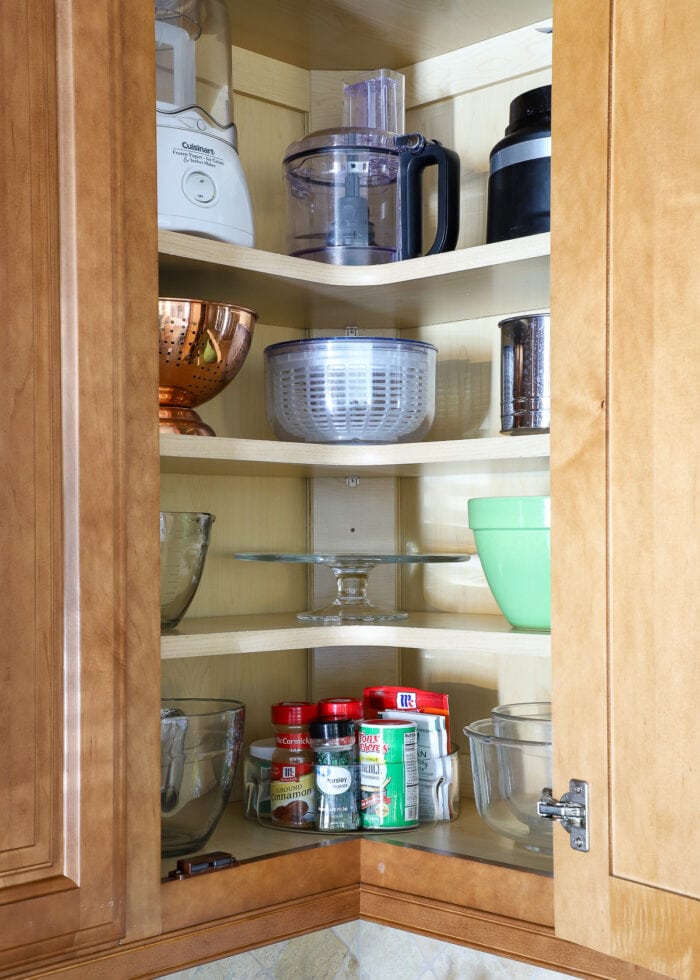
How to Organize Corner Kitchen The Homes I Have Made
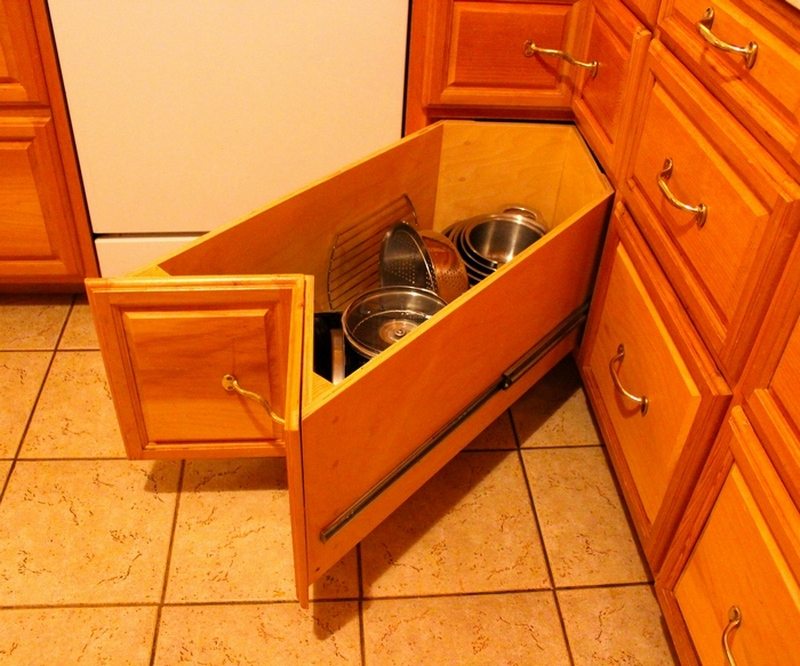
Build a Corner Cabinet with no wasted space. I built non traditionally sized cabinets for my pantry. The cabinets on the left are only 20″ deep while the right cabinets are a whopping 28″ deep. I'll also show you the mechanics and inner workings of the rolling, sliding and hinging cabinet puzzle and you can make this system work for your.
Ana White Cute corner DIY Projects
STEP 3: ATTACH FRONT ANGLES. Using glue and 1.25" Kreg screws, attach a front angle piece to the side. The non-angled edge of the front angle piece should be flush with the edge of the side. The longer side should be facing outward. Repeat with the other side and front angle piece.

5 Choices of Ideas to the Problem of Corner Kitchen
A corner cabinet is a great way to take advantage of a space that's often wasted in a room. But building one can seem a little bit like taking a geometry test. Getting all the angles right and still presenting an attractive face to the room can be a challenge. On top of that, you're presented with the choice of whether to build a full-sized, tall cabinet or a shorter base unit. The cabinet.

How To Build A Corner In The Kitchen / Fabulous Hacks To
#cornercabinet #kitchencabinets #cabinetsWhen building any corner cabinet, basic rules apply. Follow along as I show how to lay out and build a typical kitch.

tall pantry for kitchen Google Search Corner pantry
Position the hinges on the door and frame, marking the screw holes. Pre-drill holes for the screws, ensuring they are aligned with the marked positions. Attach the hinges to the cabinet door and frame using the screws. Check that the door swings smoothly and aligns flush with the cabinet frame when closed.
